
The Ultimate 64-bit PC Home Theater Guide
Franco Vitaliano
If you live in a home that is not a McMansion, or in an apartment like I do, you are always torn between wanting the biggest TV or DVD picture possible, but without turning your crib into a mini-cineplex that drives out the dining table and the rest of your furniture, not too mention a spouse or partner who still reads Martha Stewart Living. Salvation comes in the form of a stow away screen that requires no drilling or special mounting, and an amazingly clever piece of technology that lets you mount a projector way off axis, say on a bookshelf or cabinet off to the viewer side, and still projects a perfectly formatted big screen picture.
Using a PC as the primary A/V source is also smart if you want maximum all-in-one box flexibility. You can use the PC to play CDs and DVDs, store and playback your audio and video collection, surf the Net, play games, and generally do all the multipurpose, multimedia things a state of the art PC is capable of these days. Of course, using a PC does not necessarily mean having to use MS Windows. You can run Linux, which is rapidly gaining in maturity and user friendliness.
Or you can use one of the incredibly powerful new G5 Apple Macintoshes. Macintoshes running MacOS X are this author’s personal preference because of their terrific reliability, great ease of use and an almost complete freedom from viruses, as well as rock hard system stability. But for this DIY article, we will use MS Windows as it still commands an overwhelming market share, although size doesn't always matter where quality of experience is concerned.
Step 1. Select the screenGetting a big screen picture is, after all, what is ultimately behind this effort. A great choice is the Da-Lite Deluxe Insta-Theater screen that comes in 60” 80” and 100” sizes. I used an 80” unit for this project with superb results. Two of the most compelling features of the Da-Lite Deluxe Insta-Theater are the screen’s easy storage and its pull up mechanism. The Deluxe Insta-Theater screen does not use an ungainly tripod. Rather, this screen’s 71” wide metal case sits directly on the floor using two narrow and thin swing-out feet. With the two 11.5” long feet in their extended position, flip open the case’s top lid and you will see a handle located at the center of the screen’s top pole. Pull up on the center handle and the big 80” screen comes up in one easy, smooth motion via a clever scissor mechanism on the screen’s backside. This mechanism stabilizes the fully extended screen and also prevents warping of the screen’s surface. The image quality of the Da-Lite Deluxe Insta-Theater screen is excellent, with enough picture gain so that the screen can be comfortably used even in a moderately lit room.
Da-Lite Insta-Theater Screen
Fully extended, the 80” screen is 82.5” in height. The 60” screen has an extended height of 75”, while the jumbo 100” version needs ceilings that are at least 95” high. When you are done viewing, just exert a small amount of pull on the center handle at the screen’s top and the whole affair glides silently back into its case on the floor. As the black metal case is only four and half inches around with its two stabilizer feet retracted, the closed up screen can stay on the floor, or even behind a regular TV or a credenza when not in use, without calling undue attention to itself. Or you can easily cart the 16.5-pound screen off and store it somewhere-- All very convenient.
Step 2. Select a ProjectorNaturally, you need a high quality projector for this beautiful Da-Lite screen. I tried two different projectors, both of which sported VGA and DVI-D interfaces. VGA has been a standard interface warhorse for years, but this old mare uses an analog signal. DVI-D, however, carries an all-digital signal, and this peppy young filly promises to romp past its old analog barn mate because the signal stays in digital format all the way from a digital source straight into a DVI-D projector. With VGA (and also S-video and component video), the digital source has to be converted into analog format before being sent down the wire, which means picture quality can suffer in the translation.
The DVI-D Specification 1.0 interface, which both projectors support, will shortly become the de facto standard on most video systems of all stripes, if only because it supports HDCP copy protection, a feature that Hollywood studios absolutely love. You can easily hook a DVI-D Spec 1.0 equipped projector up to a HDTV tuner, a DVD player, a game console or a PC that has a DVI-D interface. Importantly, the source device does not need to support HDCP and/or Spec 1.0, a key point, as you are not restricted in your choice of PC display cards. They just need to support a standard DVI-D interface.
The two projectors I tried were an NEC HT1000 ($4,995 list) and an InFocus Screenplay 7200 ($8,000 list). Both projectors use a Texas Instrument DMD (Digital Micromirror Device (DMD) chip. But it’s which DMD chip is used and how they implement it that sets the two projectors firmly apart. The NEC HT1000 uses a 4:3 aspect ratio with a native 1,024 x 768 resolution, but that’s lopped off to 1,024 x 576 with a 16:9 screen. In contrast, the InFocus ScreenPlay 7200 uses TI’s Mustang HD2 DMD chip, which has a native resolution of 1,280 x 720 and sports a native aspect ratio of 16:9.
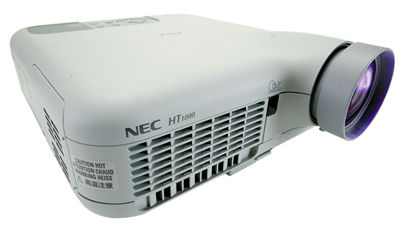
NEC HT1000
This is significant because when you go from 4:3 to 16:9, as with the NEC HT1000, you get unused pixels that cause “light spray”. This is an artifact caused by reflections off unused portions of the DMD chip, which, thankfully, is mostly not visible in normal use and it occurs above and below screen level. But there is no light spray to fret about with the InFocus, because this projector was designed from the get go for showing big screen 16:9 extravaganzas. As icing on the video cake, the InFocus also features Faroudja DCDi video processing that eliminates jagged edges that appear when standard interlaced video is viewed on progressive-scan displays, making such video images look more natural.
The InFocus has its own version of a DVI-D interface; something called an M1-DA, which connects at the projector end with a $59, 10-meter cable only available from InFocus. The other cable end connects to any standard DVI-D interface. Both projectors also offer the usual assortment of standard video inputs, as well the opportunity to tweak the picture to your rapidly beating nerd heart’s content.
Bottom line, if you've got the extra bucks, go for the InFocus 7200.
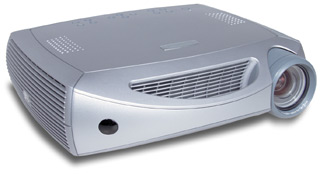
InFocus Screenplay 7200
With the NEC HT1000, I used a 10-meter DVI-D cable from Ultralink, its XLO DVI-D, which is quad-shielded for maximum protection from EM and RF interference. It has a virgin PVC outer casing that also facilitates in-wall and conduit installations. As with all Ultralink interconnects, “laboratory grade” 6N (99.99997%) purity copper is used in both conductors and shield for improved performance. I also wanted to see how VGA and DVI-D images would compare, so I used a Video Products Inc. 25 foot, VEXT-25 VGA extension cable that can support resolutions as high as 1900x1200 video resolution without ghosting and no degradation. This VGA’s cable’s 15 HD male-female pins and contacts are gold plated and the cable is shielded with copper braid and aluminized Mylar foil.
Step 3. Processing The ImageThis is where it gets really cool. This DIY project presumes you don’t have a spare room for a dedicated home theater to permanently mount the projector on the ceiling or high up on a wall--or you just don’t want to mess up your den or living room. That means you have to haul the projector out every time you use it, set it up, adjust it, etc. And while both projectors are reasonably quiet, their fans, if close enough to you, are distractingly audible. But suppose there was a way to set the projector up on a shelf or cabinet way off to the side from where you sit, say up to 40 degrees horizontally and 30 degrees vertically off axis, and still get a perfectly formatted big screen picture? If you could do that, it would mean that these smallish projectors could be set up virtually any place in the room and left where they are, without having to drill holes and running wires and all the rest of the fixed installation nonsense.
The name of the magic box that will do all this for you is the Image Anyplace from Silicon Optix. The Image AnyPlace is a high performance video and graphics image scaler that features unique image geometry correction technology that does extreme keystone correction. This technology was originally developed for head mounted displays for pilots flying attack helicopters. It’s very cool, cutting edge stuff.
Silicon Optix Image AnyPlace
The Image Anyplace also compensates for the optical distortion effects of throw ratio and lens offset in a projector. In practical use, the Image AnyPlace was a snap to setup and use. Adjusting the keystone with the projector about 30 degrees off axis was a simple, very intuitive process, and yielded excellent viewing results.
For plasma displays, the Image Anyplace unit provides region-based panoramic scaling, allowing for simultaneous application of different scaling techniques for different regions of an image, for example, video images combined with a scrolling text region. The Image Anyplace scaler features a wide variety of input/output options, which can be mixed together in any combination, including VGA, DVI-D, S-video and component (NTSC, PAL, SECAM), and HDTV. It also does 16:9 and 4:3 aspect ratio conversion, and can be used to adjust contrast, brightness, hue, gamma saturation, and color temperature. All of these capabilities are wrapped up in a case just 15”w x 8.5: deep and 1.75” high. The Image Anyplace is also inaudible when it’s running. Runco International, the maker of high-end home theater products, has selected the Silicon Optix sxW1-LX Advanced Image Processor for its next generation, advanced home theater systems.
And for the true nerd or pro A/V system designer, try out the Silicon Optix eWarp Designer software (optional) that enables image corrected display onto curved, cylindrical and irregular surfaces. Are there any flight sim fans out there reading this? You can now take your standard flight sim software, run the PC’s video output through the Image Anyplace and out onto a curved surface that simulates a jet fighter canopy and get a “real world” projection. Hoo-hah! JVC is using the eWarp technology for one of the largest simulation facilities in the world, the CyberDome in Tokyo Japan.
Step 4. Build A 64-Bit, Multimedia Wi-Fi PCNow for some fun, building a high performance multimedia PC to drive your DVI-D home theater. For this project, we are using AMD’s new 64-bit chip, the Athlon64. Although a 64-bit MS Windows OS is still a ways off, its current 32-bit OS performance on this new AMD CPU is still spectacular. But if you want maximum performance right now, LINUX already supports the full 64-bit capabilities of this CPU, e.g., S.u.S.E LINUX Pro for Athlon 64.
I used an Athlon64 3200+ that has a real clock speed of 2.0 GHz and a 754 pin-out. The 3200+ is the entry level Athlon64. The high performance version is the Athlon64 FX. The Athlon64 has 105.9 million transistors, making it the most complex desktop processor in the world.
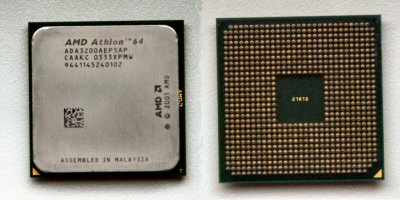
AMD Socket 754 3200+ 64-bit CPU
The older 32-bit Athlon’s have about half as many transistors. The new 64-bit Athlon’s require a different CPU cooler style than the 32-bit Athlon’s, and the one recommended by AMD is made by AVC (part # Z7UB301001), which is what I used in conjunction with a 754-pin Athlon64 motherboard made by MSI, the K8T Neo-FIS2R. As with Intel P4 CPUs, the Athlon XP 3200+ will only hit its performance potential in a fully optimized hardware environment, which means you will need a motherboard with a dual-channel interface and FSB200 and ripping fast DDR400 RAM.
This MSI board uses the VIA K8T800 chipset and supports up to 2 GB of RAM. With the K8T Neo, you can hook up to four IDE hard drives, and also use an on-board Serial ATA controller that supports 2 serial ATA (SATA) drives. In addition, it has a second SATA chipset that supports RAID arrays (two discs) in either a high performance RAID 0 configuration or a data fail-safe RAID 1 configuration. The same chip set also connects up to two high performance ATA 133 drives. The K8T Neo has on-board 6-channel audio codecs, as well as has dual Ethernet LAN ports, which can run as fast as a gigabyte/second.
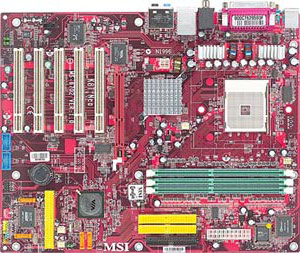
MSI K8T Neo-FIS2R Motherboard
The K8T Neo is a state of the art socket 754 board and I used it with mostly good results. However, the K8T Neo had trouble supporting a RAID 0 setup as the primary C drive. Interestingly, I encountered the same RAID 0 primary C drive problems with another 64-bit Athlon board that I had in for a brief period, the GA-K8NNXP board made by Gigabyte. These problems persisted even when I used a 3rd party SATA RAID controller card, and at this point it’s anyone’s guess why these problems occurred. Furthermore, one of the K8T Neo motherboards subsequently failed, and the cause of this problem is still being looked into by MSI engineers.
Finally, socket 754 boards will soon be going into the budget system category and new generation AMD 64-bit CPUs will be using socket 939 motherboards, so the socket 754 solution is something of a dead-end if you want to upgrade AMD CPUs in the future.
Using a high performance Ultra ATA 133 IDE drive, in this case, a 250GB unit from Maxtor, as the primary C drive went absolutely smoothly and caused no problems at all.
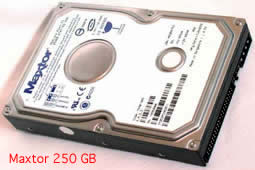
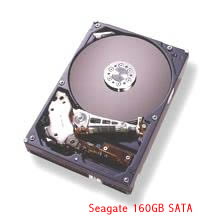
With the Maxtor as the primary C drive, I also had no problems using two 160GB Seagate SATA drives configured in a RAID 0 array and running as a secondary drive. With the 250 GB Maxtor and the two 160 GB Seagate’s, I had more than 550GB of usable disc space, ample room for creating a whole-house audio and video server. Topping of this hard drive mix was a Plextor PX-504A DVD+R/RW and CD-R/RW combo drive.
For system memory, I used 512MB of high performance DDR RAM from OCZ Technology, which not only works great, but also looks great in its shiny metal packaging—it’s almost a shame to hide it inside the PC case.
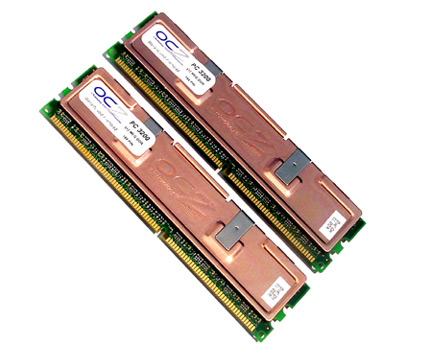
OCZ RAM
For the final hardware touch, you need a high performance 3-D graphics card with VGA and DVI-D interfaces. For this all-important task, I chose the ATI Radeon 9800 Pro card. I used both its All In Wonder (AIW) version and the standard Pro version. The AIW 9800 features a TV tuner and extra AV inputs. 3-D performance of both 9800 cards was almost identical. The TV tuner on the AIW featured a superb picture, and in conjunction with Showshifter software from Home Multimedia Networks, it made a dynamite PC-PVR system that could showshift at even very high resolutions without dropping frames or picture stuttering. Better yet, there was no one at the other end of the wire, as with commercial PVR systems, monitoring what I was watching.
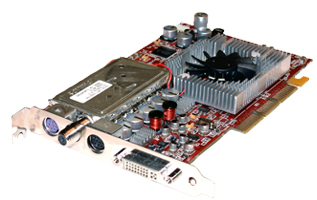
ATI All-in-Wonder 9800 Pro
The Athlon64 3200+ is a really quick CPU. Apart from doing heavy lifting multimedia work without breaking a sweat, it is also a great gaming platform, especially with the pixel-ripping performance of the ATI Radeon 9800 Pro graphics card. The AMD 3200+ also ran 20%-30% faster across all benchmarks in comparison to an Intel 3.20 GHz Pentium 4 CPU/Intel PERC motherboard I had on hand. Moreover, the AVC-AMD CPU fan ran much quieter than the Intel CPU fan.
The MSI board comes with its Dynamic Overclocking Technology that does automatic overclocking by detecting the load balance of the CPU while its running programs and adjusts for the best CPU frequency automatically. You can also go into the comprehensive MSI BIOS settings and manually tweak away. The MSI K8T Neo motherboard also has desk top utilities for tweaking and overclocking the system, including adjusting system and CPU fan speeds that cut system noise as much as 50%, as well as having adjustable features for saving up to 65% in power.
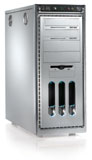
Of course, you have to wrap all this hardware up in a PC case suitable for a home entertainment system, which means you need a very low noise enclosure. I actually built two different Athlon64 systems, both using a MSI K8T Neo motherboard. For one system, I used an Overture case from Antec. In the other system, I used a P160 Antec case. Both systems ran so quiet you almost had to press your ear up against them to hear if the computer was on.
But these two Antec cases have very distinct personalities. The Overture case rather looks like a full rack DVD player on steroids. Although meant to lay flat, you can also prop the Overture case up vertically. It has a 380-watt power supply and you can stuff up to seven disc drives into its piano gloss black enclosure. You could easily put this highly attractive Antec case into your home entertainment center and pass it off as an A/V component. Because the Overture case is so quiet, you can leave the computer on all the time and never notice it.
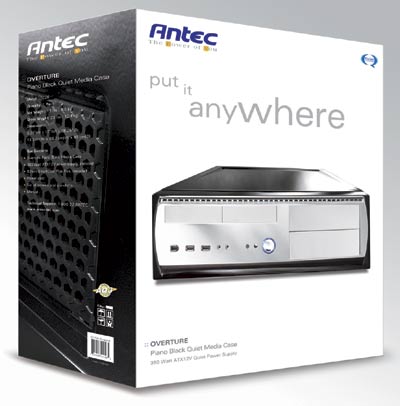
Antec Overture Case
The other Antec case, the P160 tower, is a completely different story with its all-brushed aluminum case. This tower of power can house up to ten disc drives. It is also a tweaker’s delight. It comes with knurled aluminum thumbscrews, a motherboard tray that easily comes out, and much more. With the P160 you can switch components in and out in a flash.
Antec P160 Case
But unlike the Overture, the P160 comes without a power supply. I used a 430-watt True Power PS from Antec. Like the Overture, the P160 case is extremely quiet, and I might suggest hooking up the very cool looking blue LEDs on the front panel so you know if the system is on or off. Both Antec cases feature audio, USB, and 1394 (Firewire) connectors on their front panels. On the P160 tower, the front connector panel and power switch swivel up or down for added convenience.
To round out the two systems, I used a superb RME Audio Digi9636 audio card in one machine, and the very good M-Audio Revolution in another. Both audio cards feature S/PDIF outputs. Although the K8T Neo motherboard comes with on-board audio, you still can’t beat a great add-in card for getting the best sound quality for home theater.
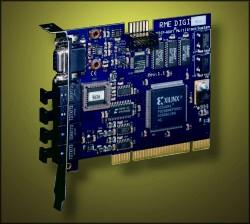
RME Audio DIGI9636
As your home theater PC may not be conveniently located to hook up a hard-wired Ethernet LAN connection, try the Wi-Fi (wireless) route. I used a Belkin 802.11g (FSD7000) add-in card that runs up to 54 megabits a second. As I already had a wired LAN elsewhere in the house, I used another Belkin product, its Wireless Network Access Point (F5D7130) to tie my wired LAN into the wireless LAN. You can set the Belkin access point to simultaneously support slower 802.11b networks and high-speed 802.11g networks, or you can put it into a mode that only supports 802.11g for maximum throughput.
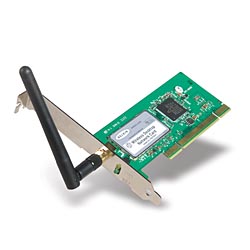
Belkin 802.11G PC card
The Belkin Wireless Network Access Point offers numerous ways to secure your wireless network. You can turn off broadcasting the Service Set Identifier that will keep your network hidden from other computers scanning for a free Wi-Fi ride. There are also settings that restrict wireless access to systems having a particular IP address. Finally, there is both 64-bit and 128-bit encryption to secure your data as it’s going over the air. In my high rise apartment building, which is filled with all kinds of signal interfering materials.
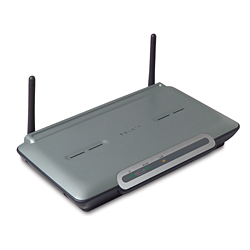
Belkin 802.11G Wireless Access Point
I could get up to 20-30 megabit second throughput with the system off in a room about 40 feet distant from the access point (it’s a big apartment). However, while it was great for cruising the net and broadcasting audio, streaming video over even an 802.11g network was problematic, even with encryption turned off. This is not the fault of the Belkin unit, but rather, probably due to the overhead associated with 802.11. There is no broadband free lunch, and to get optimal A/V network performance you will need to hard-wire your home, or wait for the next round of high-speed Wi-Fi standards.
Naturally, you need to communicate with your multimedia PC, which may be across the room, so a wireless keyboard and mouse are mandatory and Belkin also makes some excellent units. Although for the ultimate wireless mouse, go for the Ultra GT Cordless Optical Mouse from Gyration that is the only mouse that can be used in the air. You flick your wrist around and the cursor moves. The Ultra GT mouse is also perfect for people with desk-bound mice who suffer from or want to avoid repetitive stress injuries.
Step 5. Choose a surround processor or a receiverAlthough there are many excellent products out there, for value for the money and true high-end audio performance, I have had tremendous success with Sunfire products. If you go the separate processor/amplifier route, the Sunfire Home Theater Grand III is hard to beat. If you want an all-in one surround receiver, try the Sunfire Ultimate Receiver that powers 7.1 and 9.1 channel set-ups, with each and every of those channels being driven with 200 watts.
Sunfire Ultimate Receiver
Step 6. Choose the speakersThis is a matter of budget and taste, but if you already have a two-channel setup and want to keep your main speakers (as I do), here are some suggestions. M&K Sound is an industry leader that makes rock solid, no nonsense pro-sumer products. Studio technicians using M&K studio monitors probably mixed many of your CD’s. On the consumer side of the house, M&K makes a comprehensive range of audio products, including for surround sound. For dens and similar smallish rooms the M&K SS 150 THX Ultra Tripole surround (available in white or black) is a terrific choice.
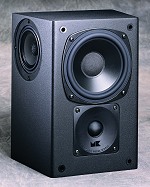
M&K SS 150 THX Ultra Tripole
The tripole moniker refers to its ability to send out sound using two direct radiators on its front panel (a 5" woofer and a 1" soft-dome tweeter), or alternatively, radiate sound simultaneously as a dipole from its left and right baffles (using two high performance 3” poly cone mid-tweeters) and also using its two direct radiators. This four-speaker in tripole mode is simply awesome. But if you have a large area, or simply want the best surround sound wherever you set up shop, check out the M&K Professional 1625, a mid-sized tripole that in addition to its two front radiators (a 1" tweeter and a 6" polypropylene mid/woofer), also sports two additional speakers on each of its sides (two 3.25" Kevlar mid-tweeters), for a total of six speakers. This speaker is available in self-powered versions with a built-in amplifier, and a conventional non-self -powered version.
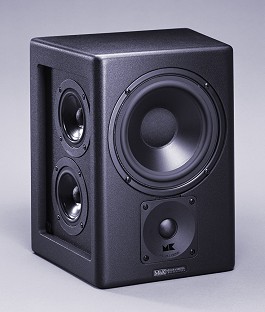
M&K Professional 1625 Tripole
To say that a pair of 1625 surrounds will rock your crib is an understatement. Finally if you need to add a high performance center channel, try M&K’s self-powered speaker, the S-150P THX Ultra Active Main Monitor. No amplifier is required with the S-150P, just a line level input. If you are doing the whole thing from scratch, try three self-powered S-150P’s up front, and two M&K 1625 surrounds
. 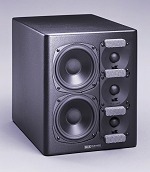
M&K 150 P Self-Powered Monitor
As for the LFE boom-boom channel, almost nothing can top the Hsu Research TN-1220HO subwoofer with its outboard 500-Watt amplifier. This Hsu sub is a black fabric covered cylinder 51 inches high (including spikes) by 12 inches in diameter.
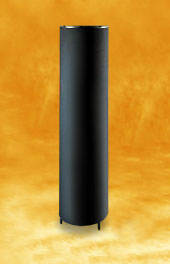
Hsu Research TN-1220HO Subwoofer
The 500-watt amp can also handle an extra TN-1220HO should you decide to upgrade and will send your neighborhood into national security threat level red. Even using a single TN-1220HO you can get 101 dB at 12.5 Hz and 117.5 dB at 50 Hz! To wire up your speakers and connect the various parts together, I am a big fan of wires from Nordost. For this rig, Nordost Red Dawn or Blue Heaven wires are good choices. The flat Nordost speaker cables also route easily and unobtrusively under rugs.
The ResultsSo, how does it all look and sound? In a word, tremendous! In terms of projectors, the tip of the hat definitely goes to the InFocus 7200. It’s a true high-def unit, and it clearly shows. It also has tremendous light output. The NEC HT1000 is no slouch, however, and it’s only in comparison to the more costly InFocus unit that you become aware of the quality differences between the two projectors. The Image AnyPlace also does its job as advertised, affording you maximum projector placement flexibility. As for sound, you will be ducking for cover with the M&K’s in the loop and the Sunfire processing the audio.
Now for the wind up, is going to DVI-D worth it? The answer is a resounding yes. Both ATI 9800 Pro cards had no problem driving either the NEC or InFocus projectors via their DVI-D inputs. In comparison to VGA, the DVI-D images were clearly better in all respects. For example, watching Seabiscuit on the big 80” Da-Lite screen with the InFocus 7200 was truly a day at the races. The picture was stunning. The vivid colors, details, and sharpness made my local cineplex look like a distant second place finish. Much of this performance can also be attributed to some excellent DVD playback software, Cyberlink’s Power DVD 5 Deluxe, which offers great flexibility in setting up optimal DVD playback on a PC.
Through many weeks of testing and use, the Athlon64, MSI K8T Neo motherboard and OCZ RAM never skipped a beat. But then, suddenly, the MSI K8T Neo board just packed up and quit. No one knows exactly why yet. The Maxtor and Seagate drives, however, worked flawlessly. Best of all, you never even know the system was on thanks to the super-quiet Antec cases. And no matter how many times the Da-Lite Insta-Theater screen was pulled up and down, its mechanism always performed perfectly.
But perhaps the biggest surprise was the Silicon Optix Image AnyPlace device. Being able to put the projector well away from the main seating area was tremendously convenient, and allowed me to have more people sit around the viewing area without worrying about whose head was getting in the way of the picture. Getting a noisy projector fan well away from ear shot was another added bonus.
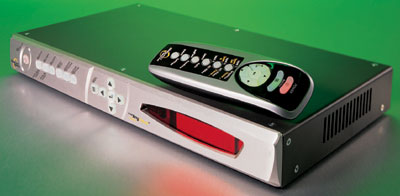
As a final reality check, I used the very highly rated $199 Bravo D1 DVD player from Vinc, which also has a DVI-D interface. (the D1 Picture quality-wise, it was a dead heat between the PC and the Bravo D1, no matter if it was the NEC HT1000 or InFocus Screenplay 7200 projector.
Bravo D1 DVI enabled DVD Player
The picture from the Bravo D1’s DVI-D interface was simply great. Convenience-wise, the Bravo was obviously much easier to set up and operate than rolling your own PC. However, for maximum A/V system flexibility, cost-effectiveness, true digital convergence and future proof-obsolescence, nothing, as of yet anyway, can beat a PC-based home theater system.
Tips:
- Always unplug a PC when doing any kind of hardware install or removal! Just because it’s switched off doesn't mean it’s turned off. Power is still trickling through the PC’s motherboard.
- Get PowerStrip. This ginsu knife of PC display utilities will let you set up your displays and projectors for optimal performance, including for High Def.
AMD Athlon64 3200+ CPU, $282 street
Antec Overture case, $119
Antec P160 case, $103, street
Antec 430 Watt True Power, power supply, $71, street
ATI Radeon 9800 Pro graphics card, $262, street
ATI Radeon AIW 9800 Pro graphics card, $333 street
AVC Athlon64 3200+ CPU cooler (part # Z7UB301001) $39, street
Belkin 802.11g card (FSD7000), $69 street
Belkin Wireless keyboard & Mouse, $48 street
Belkin Wireless Network Access Point (F5D7130), $90, street
Cyberlink Power DVD 5 Deluxe software, $70, street
Da-Lite 80” Deluxe Insta-Theater screen, $400, street
Gyration Ultra GT Cordless Optical Mouse, $80, street
Hsu Sub TN-1220HO subwoofer with 500-Watt Amp, $1,250, MSRP
InFocus Screenplay 7200 projector, $5,000, street
InFocus Screenplay 7200 M1-DA DVI-D cable, $59, 10 meters
M&K 1625 surround speakers, $999, each
M&K S150P self-powered speaker, $2399, each
M&K SS 150 Dipole/Tripole surround speakers, $1399, pair
M-Audio Revolution audio card, $99, street
Maxtor 250GB Ultra 133 IDE disc drive, $260, street
MSI K8T Neo motherboard, $122, street
NEC HT1000 projector $3,575, street
Nordost Blue Moon cables, Pricing varies with length
Nordost Red Dawn cables, Pricing varies with length
OCZ Technology 512 RAM, $140 street
Plextor PX-504A DVD+R/RW and CD-R/RW combo drive, $145 street
RME Audio card, $399, street
S.u.S.E LINUX Pro for Athlon 64, $110, street
Seagate Barracuda 160GB Serial ATA Disc Drive, $123, street
Showshifter software, Home Multimedia Networks, $59, only available on-line at www.showshifter.com
Silicon Optix Image Anyplace processor, $1,495
Sunfire Home Theater Grand III processor, $2,700 street
Sunfire Home Theater Grand III receiver, $3,650 street
Video Products Inc, 25 foot VEXT-25 VGA extension cable, MSRP, $28, available from www.vpi.us
Windows XP Pro, $150, street
XLO DVI-D 10 meter cable, $220, MSRP
21st, The VXM Network, https://vxm.com